October 2020 Meeting

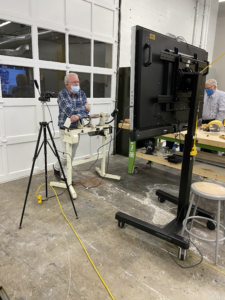
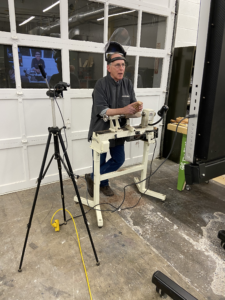
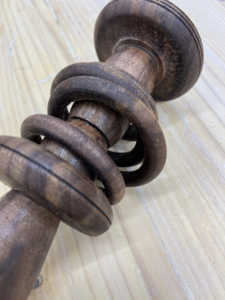
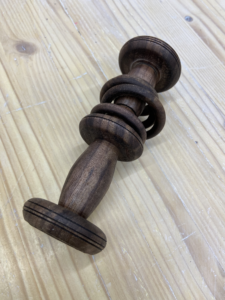
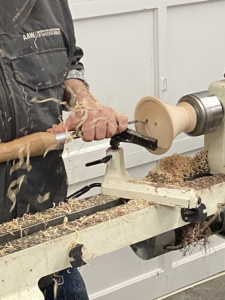
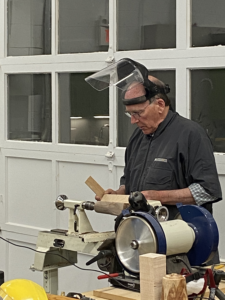
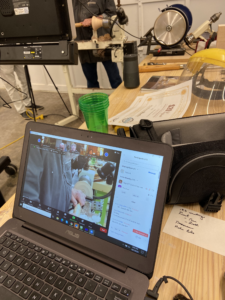
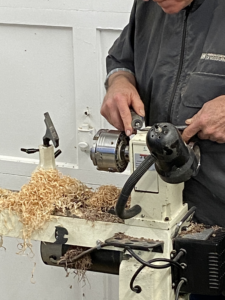
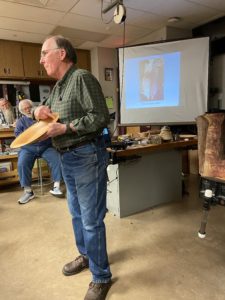
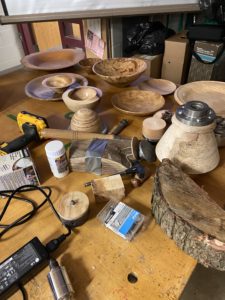
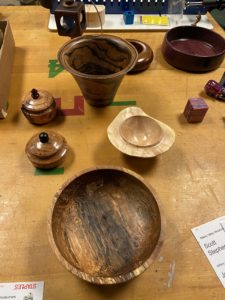
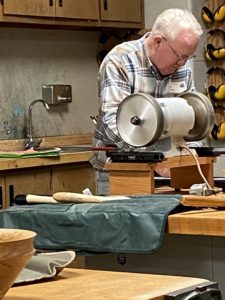
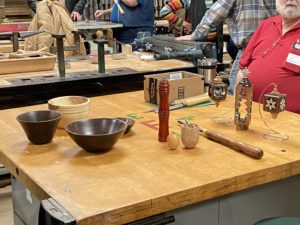
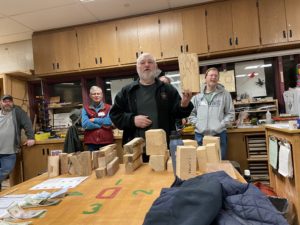
On October 1st we returned to the Rivet to use their facility and video streaming setup to host a zoom meeting with Jim Finley demoing making a baby rattle and hook tool usage and sharpening of a hook tool and double grind rake scraper.  Some pictures of the event with a glimpse at how remote meetings are done.

There were 22 members in attendance (locally and virtually).  We had 2 camera angles resulting in excellent video.

Several members who attended virtually reported that it was the best demonstration of tool use they had seen – and that the virtual format actually allowed them to see more than they could in a face-to-face meeting.  We recorded the meeting and will distribute the link to all paid members within the next few days.

The winners of the gift certificates:

  • Ken Vasko
  • Mike Lebo

$20 each from Woodturnerswonders.com.  We hope to make more opportunities for members who join our Zoom meetings

MANY THANKS to folks at The Rivet who provided much needed equipment and hours of their time to make our meeting successful.  Our collaborative relationship with The Rivet is benefiting both of us.  They are providing opportunities for us to sell our own works for our own profit.  They are providing opportunities for us to help them sustain the Makers World.  They are making opportunities for us to teach classes and to have a lathe available for members who don’t have their own. This has become a very productive relationship, and we hope you will continue to do everything possible to support it.


Watch the full meeting here

March 2020 Meeting

Our March meeting occurred on the 5th, just before all the masks and lockdowns came into full force due to the COVID 19 pandemic.  We setup 4 lathe stations at the Rivet and had 4 turners demonstrating different techniques.  Attendees could go around and watch, ask questions and even try their hand at the lathe.  The topics were:

  • Hollowing/End Grain – hook tool, spindle gouge, square scraper
  • Skew chisel
  • Chucking – tenon, jam chuck; shear cut on outside of bowls
  • Roughing, beads and coves

Videos taken during the event can be found here:


February 2020 Meeting

Jim Finley shared his perspective on getting the most out of each piece of wood by considering grain and mounting the piece in the most beneficial position.

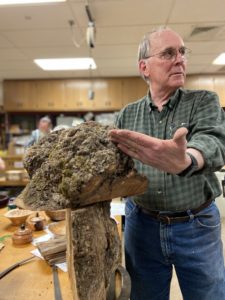
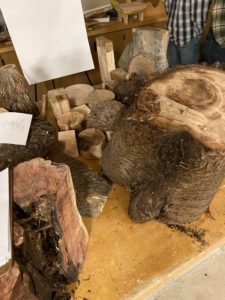
As Jim’s says:  “Wood is essential to our hobby – woodturning. Finding turning wood, free or otherwise, is challenging, fun, and may provide opportunities to make new friends and provide access to myriad species and unique cuts. Sometimes, the most interesting finds are things you might overlook.”   At this NVWT meeting, he talked about, which cuts to take for figure or interesting grain, unique species (common and uncommon), and diseases that create spectacular wood and how to take advantage of the figure you find in wood.  

People brought along their own unique examples of wood to get advice.

He also explored different approaches for mounting special finds on the lathe.  Surprising to many of us, he usually avoids faceplates and turns between centers.  A 2 prong spur can grip better because it will go deep when aligned with the grain.

We also had our normal Instant Gallery (aka show and tell)


January 2020 Meeting

Our January 2020 meeting presentation was on sharpening using a variety of tools, jigs and techniques brought to us by Jim Finley, Dan Kozar, and Reg Goeke.

Checkout our YouTube channel for some video highlights

Some member made items for show and tell:

A typical wood auction: 

Some notes on sharpening from Dan:

Start by choosing the angle of the grind. The angle that a tool comes with may not be correct. A good starting point is: 35° for spindle gouges, 60° for bowl gouges, 25° for skews and parting tools, and 80° for scrapers. 2 0r 3 degrees either side of these numbers is fine. New tools almost always need sharpened before you use them, even if the angle is correct.

I use the Wolverine, also called the Oneway  system for all my sharpening.

I sharpen roughing gouges, skews and scrapers on the Wolverine platform. The combination of the angle of the platform, and the distance of the platform from the wheel, determine the angle of the grind on the tool.

I sharpen spindle and bowl gouges with the Wolverine Vari-Grind jig. This jig is tricky to set up. For spindle gouges I set the arm of the Vari-Grind near the top of the jig, and for bowl gouges somewhere around the middle. The first thing is to get the correct angle. If the angle of the tool is correct, put the arm of the Vari-Grind in the pocket of the long arm of the Wolverine system, and slide it in and out until the bevel of the tool matches the wheel exactly. To check this, I shine a flashlight on one side of the tool where it meets the wheel and look at the other side of the tool to see in any light shines through. If light shines through at the top (edge) of the tool, pull the long arm out a wee bit and try the light again. If light shines through the bottom (heel), push the long arm in. Once you have it adjusted that no light shines through, you are good to go. You can also check the angle by using a black magic marker to paint the bevel of the tool black. Put the tool in the jig in the long arm, rest the tool on the wheel, and rotate the wheel by hand 3 or 4 revolutions. If you have a shiny strip from top to bottom, you are good to go. If you see black at either the top or bottom, adjust the long arm as if you see light shining there. But every time you adjust the long arm, you have to repaint the tool bevel.

If you want a different angle than what is already on the tool, or you change the position of the arm on the Vari-Grind, start by matching the bevel to the wheel by eye. It doesn’t have to be exact. Push the long arm in if you want to go to a sharper angle. Say from 40° to 35°. Or pull the long arm out, if you want to go to a less sharp angle. Say 35° to40°. After each adjustment, check the angle of the bevel.

If you are using stone wheels on your grinder, you will need to adjust the position of the long arm every 2 or 3 times you dress the wheel. Every time you dress the wheel, it gets smaller. As the wheel gets smaller, and you don’t reposition the long arm, the angle of the bevel gets less sharp.

If you have  CBN wheel, you never have to dress it. Therefore, you canmeasure the distance between the front of the pocket of the long arm, and the base it slides in, and cut a piece of wood to this length. Label the block of wood as to which tool it is for. Do this for each type of tool. Then you can easily use the block of wood to adjust the position of the long arm for each tool type. No need to use the flashlight, or magic marker when you go from a spindle gouge to a bowl gouge.

When grinding, exert VERY LITTLE pressure against the wheel. Hold the tool near the jig, NOT at the end of the handle. Watch the shape of the tool as you grind, and keep the tool moving. If you hold the tool in one position, you will get a flat spot.

Sources:

Sharpening Woodturning Tools  Book available from AAW

Sharpening turning tools   71-page article on AAW website

Don’t expect to a get a perfect grind on your first try.  It takes practice !


December 2019 Meeting

December meeting at Mount Nittany Middle School.

Tis the season – and Joanne Westerhaus brought festive food for the start of our meeting.  Great opportunity to mix, meet, and network with other members.

Consistent with the holiday season, we’ll be raffling off 10 – 12 gift certificates from Craft Supplies and from Carter and Son Toolworks

We learned about scholarships to attend either the Campbell Folk School for Turners or the Arrowmont school for Turners.  Any member interested needs to apply by January 15th.   http://tiny.cc/AAWScholarships

Don Wilson was our Guest Demonstrator for this meeting.  Don teaches woodturning at the Woodcraft store in Harrisburg and at the York Town Craft Guild in York, PA.  He’s a Past President of the South Central PA Woodturners and is juried as a Master Artisan by the PA Guild of Craftsmen.  Don taught us about embellishments in turning, with an emphasis on Wood Burning, Pyrography, and Branding.  Don went over:

  • Differences in tools
  • How to get designs and get them on the wood
  • The big difference in Pyrography and the control of the tool
  • Adding color
  • Branding – what is it and what is different
  • Making your own designs
  • Mixing and matching pyrography and branding
  • Using “indexing” on the lathe to make sure things come out right when working “in the round”


October 2019 Meeting

In October Dave Lutzkanin from Windy Hill WoodTurning shared all kinds of information and tips for selling products at craft fairs.  There are many things to consider and if you are interested you’ll find this information invaluable.

www.windyhillwoodturning.com

So, you want to do craft shows?

This article is based on a presentation Dave gave as a demonstrator at the Totally Turning Symposium in Saratoga, NY in March 2019. The following is provided as a guide of information for consideration prior to your first show.

Like many other craftsmen, the plethora of objects collected by our turning hobby soon outgrows the gift giving of friends and relatives. Encouraged by those people who have received gifts, we think about making money from our hobby and new found skills. Beware! This may soon turn into a job! If you are just hoping for a few sales to buy more tools and materials, then I suggest you stick to selling online with Facebook, Etsy, etc. For some of us, we view our hobby as a money making venture. Enter the craft show! Allow me to say this now; if you are planning to do shows on a regular basis, you will need to make a considerable investment of both time and money. It has been said in the business world, that you can’t make money without spending money first, and that certainly holds true here. There are many investments and expenditures that you will encounter. My goal with this article is to help you begin.

My fiance’, Elaine Nichols and I did our first show in 2012. Our booth from that first show is figure #1. Our venture has come along way since then! Our booth, displays, products, thinking and skills have been transformed during this journey. I hope to provide you with plenty of food for thought with this article.
So, you want to do craft shows? What’s next? Let’s begin…..

Locating shows ​
​First, you need to find a show.
–​Talk to vendors at shows​. The most knowledgeable people are the full timers. They dont waste time on poor shows. Also don’t be afraid to ask for advice, opinion and commentary from these artisans.
–​Google is your friend here​. There are various services and sites that will email you lists of shows in your region. Some are free, some ask for a fee. –​Try to stick with juried shows​. A juried show means your work is judged by a jury and accepted as quality enough to enter the show. Good photos are paramount here. Jurying prevents you from being next to the “popsicle stick” sort of crafts. It also prevents an overload of the same type of craft. There are exceptions however. One of our best shows annually is not juried. But we have been burned several times. It’s a gamble.
–​Attend a show in person the year before whenever possible​.​ This lets you see the show, how its run, the quality of the work, the crowd, traffic flow and any competition. Take notice of the customers. Listen to the customers. Are they carrying bags of purchases or walking around with no bags? Are they only there for the food, the music or the fireworks? Are these people your target clientele? Some shows attract a great crowd, but the sales are poor. Your top show may be another’s worst show. It’s all in the customer base. You need to know the area. Is it affluent or economically depressed?
–​Be wary of shows with alcohol.​ Wine and craft beer festivals can draw a large crowd, but are they shopping or drinking? Again, it pays to check this type of show out in person. Obviously, intoxicated people bring their own unique set of issues. Another gamble.
Expenses to Consider​ ​Every business needs start up cash​.
–​Jury fees and application fees are standard.​ B​ ooth fees vary depending on size ( 10 ft by 10 ft is common) and duration of show (one day vs four day). The shows we enter, on average, cost about $100 per day plus jury fee. Most jury fees are $15-$50 and are payable up front before acceptance or rejection and are non refundable.
–​Taxes.​ Sole proprietorship, LLC, or S Corp? Talk to your accountant. You will probably begin as a sole proprietorship. Save the receipt each and every time you reach in your wallet for a business purchase. Keep track of business mileage for your vehicle.
–​Canopy.​ Must be strong enough to withstand severe weather. Hold it down! Stakes, weights, etc. Walls are necessary and sometimes required by the show. If you plan to make this a long term venture, then invest in quality. The canopies with steel pipe framing are worth every penny and withstand adverse weather far better than the cheap ones from a department store.
–​Insurance.​ ​Doing business is risky without liability insurance in today’s litigious society. AAW members can purchase through the Hartford Group. Info on AAW website. Protect yourself.
–​Inventory.​ ​And so it begins! You need to get busy making your products to sell. The largest time investment you will make is with production. Find efficient ways of making items quickly. TIME IS MONEY! I hate to break this to you, but you will spend a considerable amount of time turning objects that you don’t WANT to turn. Making items that sell is your goal. I very rarely get to turn what I WANT to turn. If you are not willing to do this, then you need to stop and reconsider your decision. Buying in bulk increases your profit margin. Purchasing wood, kits, and other materials in bulk will save you money in the long run. This point could easily be another article in itself.
–​Plastic Totes ​Purchase plastic tote boxes from your local store. Get the type that have clamping lids and stack easy. You may need different sizes depending on your products. Learn from my experience here. It seems like a good idea to recycle those cardboard shipping boxes to transport product, until it rains! Or you pick up a cardboard box that was sitting on the ground and absorbed moisture from overnight dew. Bam! All your expensive handmade items are now on the ground! These totes go on sale frequently, shop smart.

–​Assorted items.​ ​Ratchet straps, bungee cords, weights, clamps, basic tools, knife, extension cord, fan, heater, etc You will add to this list after a show or two.
Conducting Business​ ​Selling accoutrements​.
–​Cash box​. M​ake sure it can be locked. Small enough to take to bathroom with you. You will invariably have to use the restroom when you are alone at a show; or you will have to return to your vehicle for an item. –​Credit card reader.​ S​ quare and paypal are the major two here. They both work from a smart-phone. In 2018, 78% of our sales were from credit cards. This is typical from speaking with our vendor friends. People don’t carry cash like they used to. We use square, its free. There is a per swipe fee and an offline mode. I created a separate, business bank account for this purpose. Another tip here from our experience…don’t accept checks. Unless you’re in offline mode on your card reader, the card will tell you immediately accepted or denied. Checks bounce. Besides, most every checking account can have a debit card linked to it for card sales. –​License.​ Sales tax license from your state or county is required for shows. This was free in our state. You also may need to register your business name. Check your locale for regulations and application procedures.
–​Internet​. Try to have a website where customers can see examples of your work. Email contact is a must in today’s world, most website hosting will have associated email accounts.
A facebook page for people to follow is also beneficial. Facebook is a great way to advertise upcoming shows, showcase booth pictures at shows, products being sold, and to sell a few items too!

–​Sales items.​ You will need bags,boxes,tissue paper, etc for items sold. Business cards, banner, price tags and signs round out your professional looking booth.
Booth Set Up​ ​How are people going to see your work?
–​Display.​ ​Avoid just using tables. Place your most expensive products at eye level. Use varying levels of display. What can people see from 50 yards away? What is going to draw customers into your booth? The interior is what sets your white canopy apart from the 100 other white canopies. Don’t be afraid to seasonally decorate.
–​Avoid clutter.​ Is it too busy? Does it look like a yard sale? Does it appear to have been thrown together that morning or does it show some thought and effort? People notice these things and they base their purchase decisions accordingly.
–​Your display should not overshadow the product​. I saw a booth once where the shelving was absolutely stunning. Made from very expensive wood, but the product being sold was very plain. It should be the other way around. The display should showcase your work. All of our displays are painted black. Choose a neutral color and go with it.
–​Weather​. Can the display withstand the weather? Wind, rain, snow, ice, humidity, muddy ground, etc? Be prepared. Clamps, tarps, clothes pins, towels and rags. Rain gear for wear? Bug spray, sun screen, heater, fan. There are many things to consider here, and it depends on you and your booth.
–​Shims.​ Take a box of shims. Ground is rarely level, even on concrete. Streets are crowned. Be careful of street gutters, they will flow with water when raining.
–​Workspace​. You need a place to “work.” This needs to be in your booth plan. Need cashier space and an area to package items. I have seen many booths over the years that fail to consider this point. This should not be intertwined with your sales space.

–​Surplus​. Where are you storing extra inventory? Your vehicle will rarely be parked in close proximity. Again, this needs to be a consideration when planning your booth layout.
— ​Dress.​ Dress professionally for the weather. An embroidered shirt or hat with your business name exudes professionalism.
–​Chairs​. Those fold up “camp chairs” are great for sitting at a ball game or around a campfire, but they are terrible in your booth. They sit too low and make you look tired. We use fold up directors chairs. They sit up at eye level with customers and allow you to see over your display. Some vendors prefer stools, Either way, you need to be up at your customer’s level. Show days are long and you will need to get off your feet.
–​Adapt or die. B​e prepared to completely adapt to the conditions. As an outside vendor, you must change with the weather. In April 2019 at one of our favorite shows, the wind was horrendous. Gusts of 40 mph were common. We realized we would have to hold the canopy all day, since the weights were being lifted off the ground. We decided to take the canopy down. Our neighbors did the same. Many vendors were packing up and leaving prior to opening time. In fact, I heard later, that close to 30 vendors had packed up and went home. We persevered. Our display had no signs, no banner, no canopy. Product was displayed so as not to blow off the shelf. Some of our shelves were empty. Many items were not even displayed. Our reward was our second best sales day at that show! Our sales were fantastic. The customers did not mind the wind and came to spend! With only a partial display and no signs, we were forced to speak to every customer entering the booth. Very proud to say we were selling items not even out on display, straight from the box. A valuable lesson learned.

–​In summation
We have a great time working shows. We meet many wonderful people and have made many new friends, both customers and other vendors. Working shows is not for everyone. I will be retiring in a few years from my career as an educator and we are looking forward to expanding our shows at that time. Currently we do about ten shows annually.

One final note: you are entirely on your own when it comes to pricing your work! Everyone of us values their time differently and our respective shows are in different socioeconomic areas. Items that sell for one price in our area may be over or under priced in yours. However, you do need to make a profit on each item, don’t give your work away.
We really hope this information assists you getting started! Good luck!

Craft Shows 2019 Slides

Craft Show pics
June 2019 Meeting

In June we had the opportunity to meet on a Saturday and see the unique setup of Joe Peachey’s Amish shop, as he demonstrated his turning techniques on his lathe.

We also had the opportunity to view and purchase burls that Joe has been collecting from local lumberjacks As well as some of his own artwork and we got to  stop for lunch at the Country Village Restaurant.

It was an excellent opportunity to get a glimpse into the history of turning, to acquire some truly marvelous burls for our own turning projects, to acquire some unique art at reasonable prices, and to further enjoy the company of fellow Woodturners and their spouses in a very relaxed setting and the drive over took us through some really beautiful country!

April 2019 Meeting

The April meeting of the Nittany Valley Woodturners will feature a presentation by local wood turner, Ken Fisher, demonstrating Turning apple forms with a customized jig. A former Marine and Retired President of MCS Bank in Lewistown, Ken is a self-taught turner since 2011.

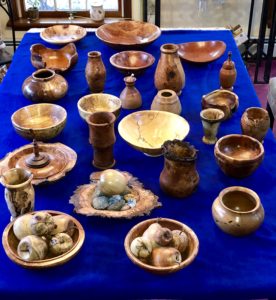
The bowl of “apples” on the lower left represents what Ken will be demonstrating. As you can see, Ken also likes to turn burls, which he gets from Joe Peachy, whose Amish shop we hope to visit in June. Time will be allotted for questions and answers for an interactive session.

In addition to the usual wood auction we will be auctioning some exotic woods recently donated to the club.

Be sure to bring pieces you’ve turned (or attempted to turn) and would like to share. We’re especially eager to have you bring pieces that may be giving you problems – whether in terms of design or tool technique. If you have a blank for which you’d like some advice regarding orientation or maximizing the available wood or the best way to mount the blank for safety – all questions are welcome.

Nittany Valley Woodturners is always looking for new members who are interested in woodturning. Our club is a chapter of the American Association of Woodturners (AAW).

We hope to see you at our next meeting on Thursday, April 4, 7-9 pm at the Mount Nittany Middle School, 656 Brandywine Dr., State College, PA

For easiest access to the school wood shop, park in the rear down the second driveway near the dumpster. You may also park in front and find the woodshop in the far left hand corner of the building as you enter.

March 2019 Meeting

Mark Mclaren demonstrated how to make a twig (weed) pot.  He also shared several design principles which everyone found very helpful.

  • Woodturning Design
    Design Elements: (things that can be manipulated or modified in some way). Common to many areas of our
    environment, photography, architecture, landscaping, pottery, etc.
  • Color/Value: Color should suit the overall shape. Value: Light vs dark within the piece (grain, etc)
  • Texture: Rough, smooth, etc. Finish to be used. How does it feel in the hand
  • Shape/Form: How will the object appear from different angles? Does appearance change with perspective?
    • Pay close attention to where flow changes shape or direction. Sharp or smooth, in between not good. o Catenary Curve: (Seen in our environment) Pleasing to the eye.
    • Where does curve end, above or below horizon?
  • Scale: Size of object should match the intended use.
  • Proportion: Relative comparison of the individual elements within the object. Curves, beads, coves,
    embellishments, etc

    • Avoid placing a design element (bead, direction change, etc) near the center line.
    • Rule of 3s. Elements or changes at 1/3 point.
    • Box lid should be 1/3 of the overall dimension.
    • For bowls/platters: Base should be 1/3 diameter of piece.
    • For closed forms: Opening at top 1/3 diameter.
    • Golden Mean: Used by Greeks and Egyptians. (1:1.618) 5:8 ratio. Used for the overall dimension of the
      object being turned.

Design Principles

  • Center of Interest, Balance, Harmony, Rhythm. Style: Modern, rustic, natural, wabi-sabi (organic, imperfect, dull, soft vague shapes, etc.
  • Plan before you turn (draw it, mark the blank, etc), visualize during turn, make changes as needed while turning.
  • Keep it simple, imperfections are ok and interesting, do what feels right for you.
  • Turn, explore, tap in to your creative side.